Build a Machine Learning Discord Bot: Getting Started with TensorFlow and Discord.py (Part 2)
In this series, we will learn how to fuse the powers of machine learning with Discord.py to create an intelligent Discord Bot. Learn the essentials of bot development and machine learning integration, setting the stage for captivating AI applications that will elevate your server experience.
RZ
9/4/20239 min read

In Part 1, we learned how to setup and invite our bot, and created our first command. Now that we know how to receive input from users and output content, we can add more sophisticated events. We have just scratched the surface of the many fun commands we will be creating. In the coming articles, we will delve into many different machine/deep learning subclasses such as convolutional neural networks(image recognition) and natural language processing(language).
Lets start with the basics first. In this article, we are going to build our first machine learning model and deploy it to our custom Discord bot. The model will be a very simple linear regression neural network. Our goal is to get ever feat wet with Tensorflow, and explore the machine learning workflow. In the end, we will create a limited functionality(for now) command that generates a prediction from the model.
Tools We Will Use
In the previous article, we used a code editor to code our Discord bot. However, we will be using Google Colab instead for building machine learning models.


Google Colab is a free, collabrative, and web-based programming environment that is interactive and easy to use. It is very popular in the machine learning and data analysis world. A great feature of Colab is the ability to change your runtime to a GPU for free. GPUs speed up machine learning and deep learning training by processing multiple computations simultaneously. Our small linear regression task will run smoothly on your computer's CPU, but in future articles, we will be working with much larger datasets and models. The ability to use a GPU will aid greatly.
If you have not used Colab before, check out this tutorial notebook created by Google. It goes over everything you need to know about Colab Notebooks.
For our code, we will use three very popular machine learning/data science libraries, Tensorflow, Numpy, and Matplotlib.


Tensorflow is a end to end open source platform for machine learning. It can be used to create all kinds of different models from regression to clustering, but is quite adept for neural networks. We will train our model using Tensorflow. Numpy is used to perform mathematical operations for large, multidimensional arrays and matrices. There are many functions that allow you to just focus on the task at hand and not worry about all the small math details. Lastly, we will use Matplotlib to create visualizations of our data and results. One of the early and most important steps in the machine learning workflow is to explore your data, and Matplotlib helps you understand it more clearly.
Quick Introduction to Neural Networks
Neural networks serve as the core technology driving much of today's artificial intelligence. These networks are constructed to mimic the way our brains process information. Consider them as mathematical models that can recognize patterns and relationships in data, much like how we humans learn from experiences. By feeding the network vast amounts of data and adjusting its internal parameters iteratively, the network learns to make accurate predictions and classifications. This learning process empowers neural networks to perform a wide array of tasks, from recognizing objects in images to understanding language and making predictions based on historical data.
At their essence, neural networks act as sophisticated problem solvers. They digest input data and transform it through interconnected layers, extracting increasingly complex features at each stage. This hierarchical approach allows them to distill meaningful information from raw data. The networks adapt their internal weights based on the errors they make during training, fine-tuning their understanding of the data over time. These capabilities have propelled neural networks into the spotlight, revolutionizing industries by providing solutions to intricate challenges that traditional programming approaches couldn't easily address.
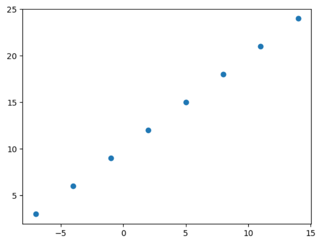
Lets create a dummy linear regression dataset using Numpy. We create an array for the X coordinate points, and another array for the Y coordinate points. We also create a scatter plot of the points using Matplotlib.
The output of this code should be a simple graph containing our points.
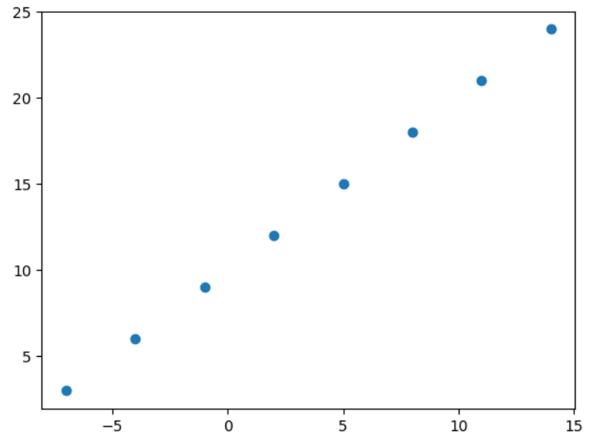
Our task is to find the line of best fit, or regression line for this set of points. With this line, we can guess what might happen next based on how the points are arranged. This helps us make smart choices using patterns we've found in the data.
To make these predictions, we create a very simple neural network.
Lets Start Coding!
Start by clicking on a cell and importing Tensorflow, Numpy and Matplotlib.
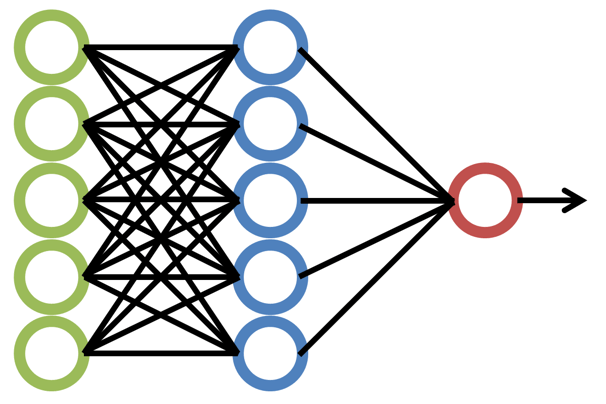
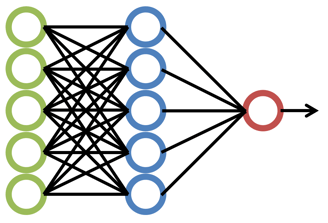
Tensorflow's Sequential API allows us to build a neural network quickly by stacking layers on top of each other. Each layer processes the data in a different way. We integrate a layer into the model by using tf.keras.layers.Dense. It is a classic building block layer, often referred to as a fully connected layer, which means a neuron receives input from all neurons in the previous layer. The current model doesn't use the Dense layer functionality to the fullest because there is only one layer. Insite the Dense function, we pass in 1, the number of neurons in the layer. The second argument an input shape of [1], which indicates the input data should comprise of one feature.
Now that we have set up our model architecture, lets configure the training process. We compile the model with two arguments, loss and optimizer. The loss function gauges how well the predictions compare to the training labels, or actual target values, during training. The optimizer helps adjust the weights and biases to minimize the loss. We will opt for the mean_squared_error loss function, measures how close regression line is to data points, and the sgd(Stochastic Gradient Descent) optimizer, a popular optimization algorithm. Choosing a suitable loss function and optimizer is vital to your model's performance, and often involves experimentation.
Now we can train our model!
We call the .fit() function on our model and pass in the input data(X) and output data, or target values(y). We also specify the amount of epochs, the number of complete passes through the dataset.
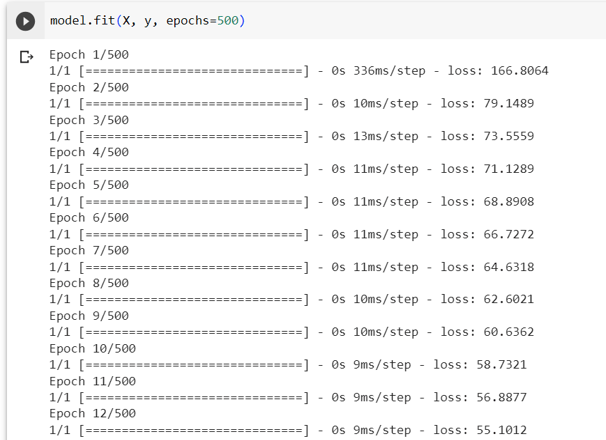
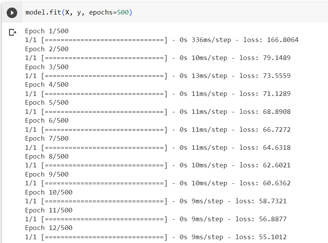
Your output should be similar to the above, and it will run until 500 epochs is reached.
We can check how well the model performs.
The points of our dataset represent the line y = x + 10. If x = 17, then y is equal to 27.

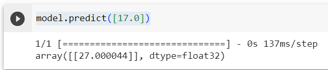
The model's prediction is 27.000044, which is quite close to our expected answer!
There are many ways to improve our model's accuracy even further. One option would be changing the model architecture by adding more layers. Expanding the model architecture by adding more layers can be a powerful strategy to enhance accuracy. Extra layers increase the model's capacity to capture complex patterns and abstract features, potentially improving its predictive capabilities. However, it's essential to tread carefully. More layers can lead to overfitting, so proper regularization techniques and a robust validation process are crucial. Moreover, consider computational resources and the law of diminishing returns. Adding complexity doesn't always guarantee proportionate improvements.
Another option would be to increase the number of epoch during model training. By increasing the number of epochs, you give the model more opportunities to learn from the data and refine its internal parameters. This can be particularly beneficial when the model hasn't yet converged to an optimal solution. However, it's crucial to strike a balance. Too few epochs may result in underfitting, where the model doesn't capture the underlying patterns in the data. Conversely, too many epochs can lead to overfitting, where the model becomes overly specialized to the training data and performs poorly on new, unseen data. To determine the optimal number of epochs, you can monitor the model's performance on a validation dataset and implement automated techniques like early stopping to find the point where further training no longer improves performance. Careful experimentation and monitoring are key to making the most of this strategy.
As enrichment, play around with your model by adding more dense layers, and increasing the amount of epochs.
We have finished building and training our model. Before we can integrate into a Discord bot, we have to first save it to our computer.
The shutil library and files module from google.colab are imported. First, we save the model using model.save(). Next, we compress the model into a ZIP archive with shutil.make_achive(). Finally, files.download() allows us to download the ZIP archive to our local machine. This is a quick and easy way to save and download our trained models.
Integrating our Model to Discord Bot
Now its what we've all been waiting for, creating a command that uses our model.
In the pervious article, we set up our Discord bot and wrote our first command. Here is the full code so far. If you would like to learn how each line works, access the article here.
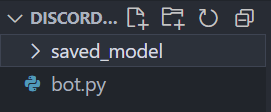
So far, we only have the bot.py file in our directory. Extract the regression model zip file, and move it to your folder.

Since we will be importing a Tensorflow model, we will have to import two new libraries.
Importing our model only involves a single line of code, which you can add above @bot.event().
It loads the model from the directory specified in the argument "saved_model", and stores it in the loaded_model variable.
We have all the tools needed to create our predict command. Create a new command under the hello() function.
The code begins by extracting the user's input from a Discord message using the ctx.message.content.split() method. This message content typically follows the format !predict [number], and the code's goal is to isolate the numeric input. The split() function breaks down the message content into separate words, with the space character as the default separator. This creates a list of words in the message, and [1] accesses the second element of this list, which corresponds to the user's input. This input value is originally in string format.
To ensure that the user's input can be used for making predictions, the code utilizes the float() function to convert the extracted string into a floating-point number. This step is essential as machine learning models require numeric input for prediction. The converted input value is then stored in the input_value variable for further processing.
The prediction process involves passing this numeric input to a pre-trained machine learning model represented by loaded_model. However, machine learning models often expect data in specific formats, and for many models, this includes a 2D array. Hence, the np.array([[input_value]]) construct is used to create a NumPy array containing the input value in a 2D format.
Next, the code employs the predict method of the loaded_model to generate a prediction based on the model's learned patterns. Finally, [0][0] is used to access the actual prediction value from the result. This indexing is necessary because machine learning models frequently return predictions in structured formats like nested arrays. Ultimately, these operations combine to create a Discord bot command that effectively extracts user input, converts it into a suitable format for prediction, and retrieves and presents the prediction, in hundredths place(.2f), within the Discord channel.
The full code is below.
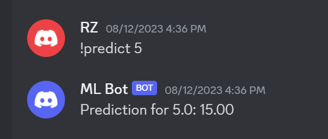
Run your bot using python bot.py on your terminal. If all goes well, we can now test our command! As we said before the equation of the points is y = x + 10.
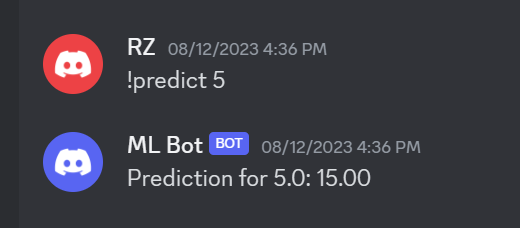

5 + 10 = 15. Our model's prediction is correct!
Conclusion
In this article, you learned how to build and train a machine learning model. We explored the fundamentals of neural networks. Using these skills, we solved a regression problem. We integrated our machine learning model into our Discord bot.
This is just the beginning of the fun. In the next post, we will be delving into convolutional neural networks(CNN). They are powerful models that are able to perform image recognition tasks at great precision. CNNs can help enhance your server in many ways, from image moderation to engagement. Just think of the possibilities!
Subscribe to my newsletter below!